In this article, we will walk you through the process of setting up digital wallet accounts and linking them to InvestaX, including popular wallets like Coinbase and Metamask.
Let's get started!
1. Using the Coinbase Wallet on InvestaX
To use the Coinbase wallet on InvestaX, follow these steps:
- Set up a Coinbase Wallet account on Coinbase Wallet web extension
- Connect your Coinbase wallet with InvestaX
- Switch network if needed
Details below.
Set Up Your Coinbase Wallet Account
If you don’t have a Coinbase wallet yet, please follow the guidelines in the below videos to set up a Coinbase Wallet account.
You can either set up a new account on the Coinbase Wallet web extension, or import your existing wallet address from your Coinbase Wallet mobile app.
Video 1: Download the Coinbase Wallet web extension and then create an account.
Video 2: In case you already have an account on Coinbase Wallet mobile app, you can import the wallet address to the web extension.
Connect Your Coinbase Wallet With InvestaX
Once you have your Coinbase wallet and browser extension ready. You can follow the steps below to connect to InvestaX.
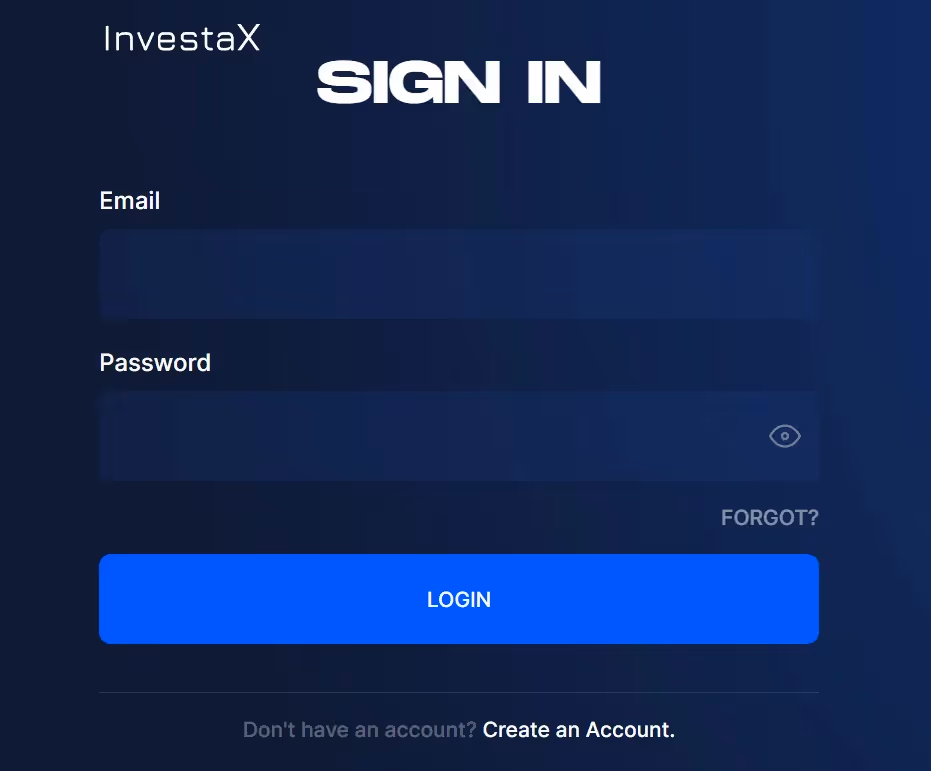
1. Sign in to the InvestaX app
Head on over to the InvestaX login portal, and sign in using your credentials.
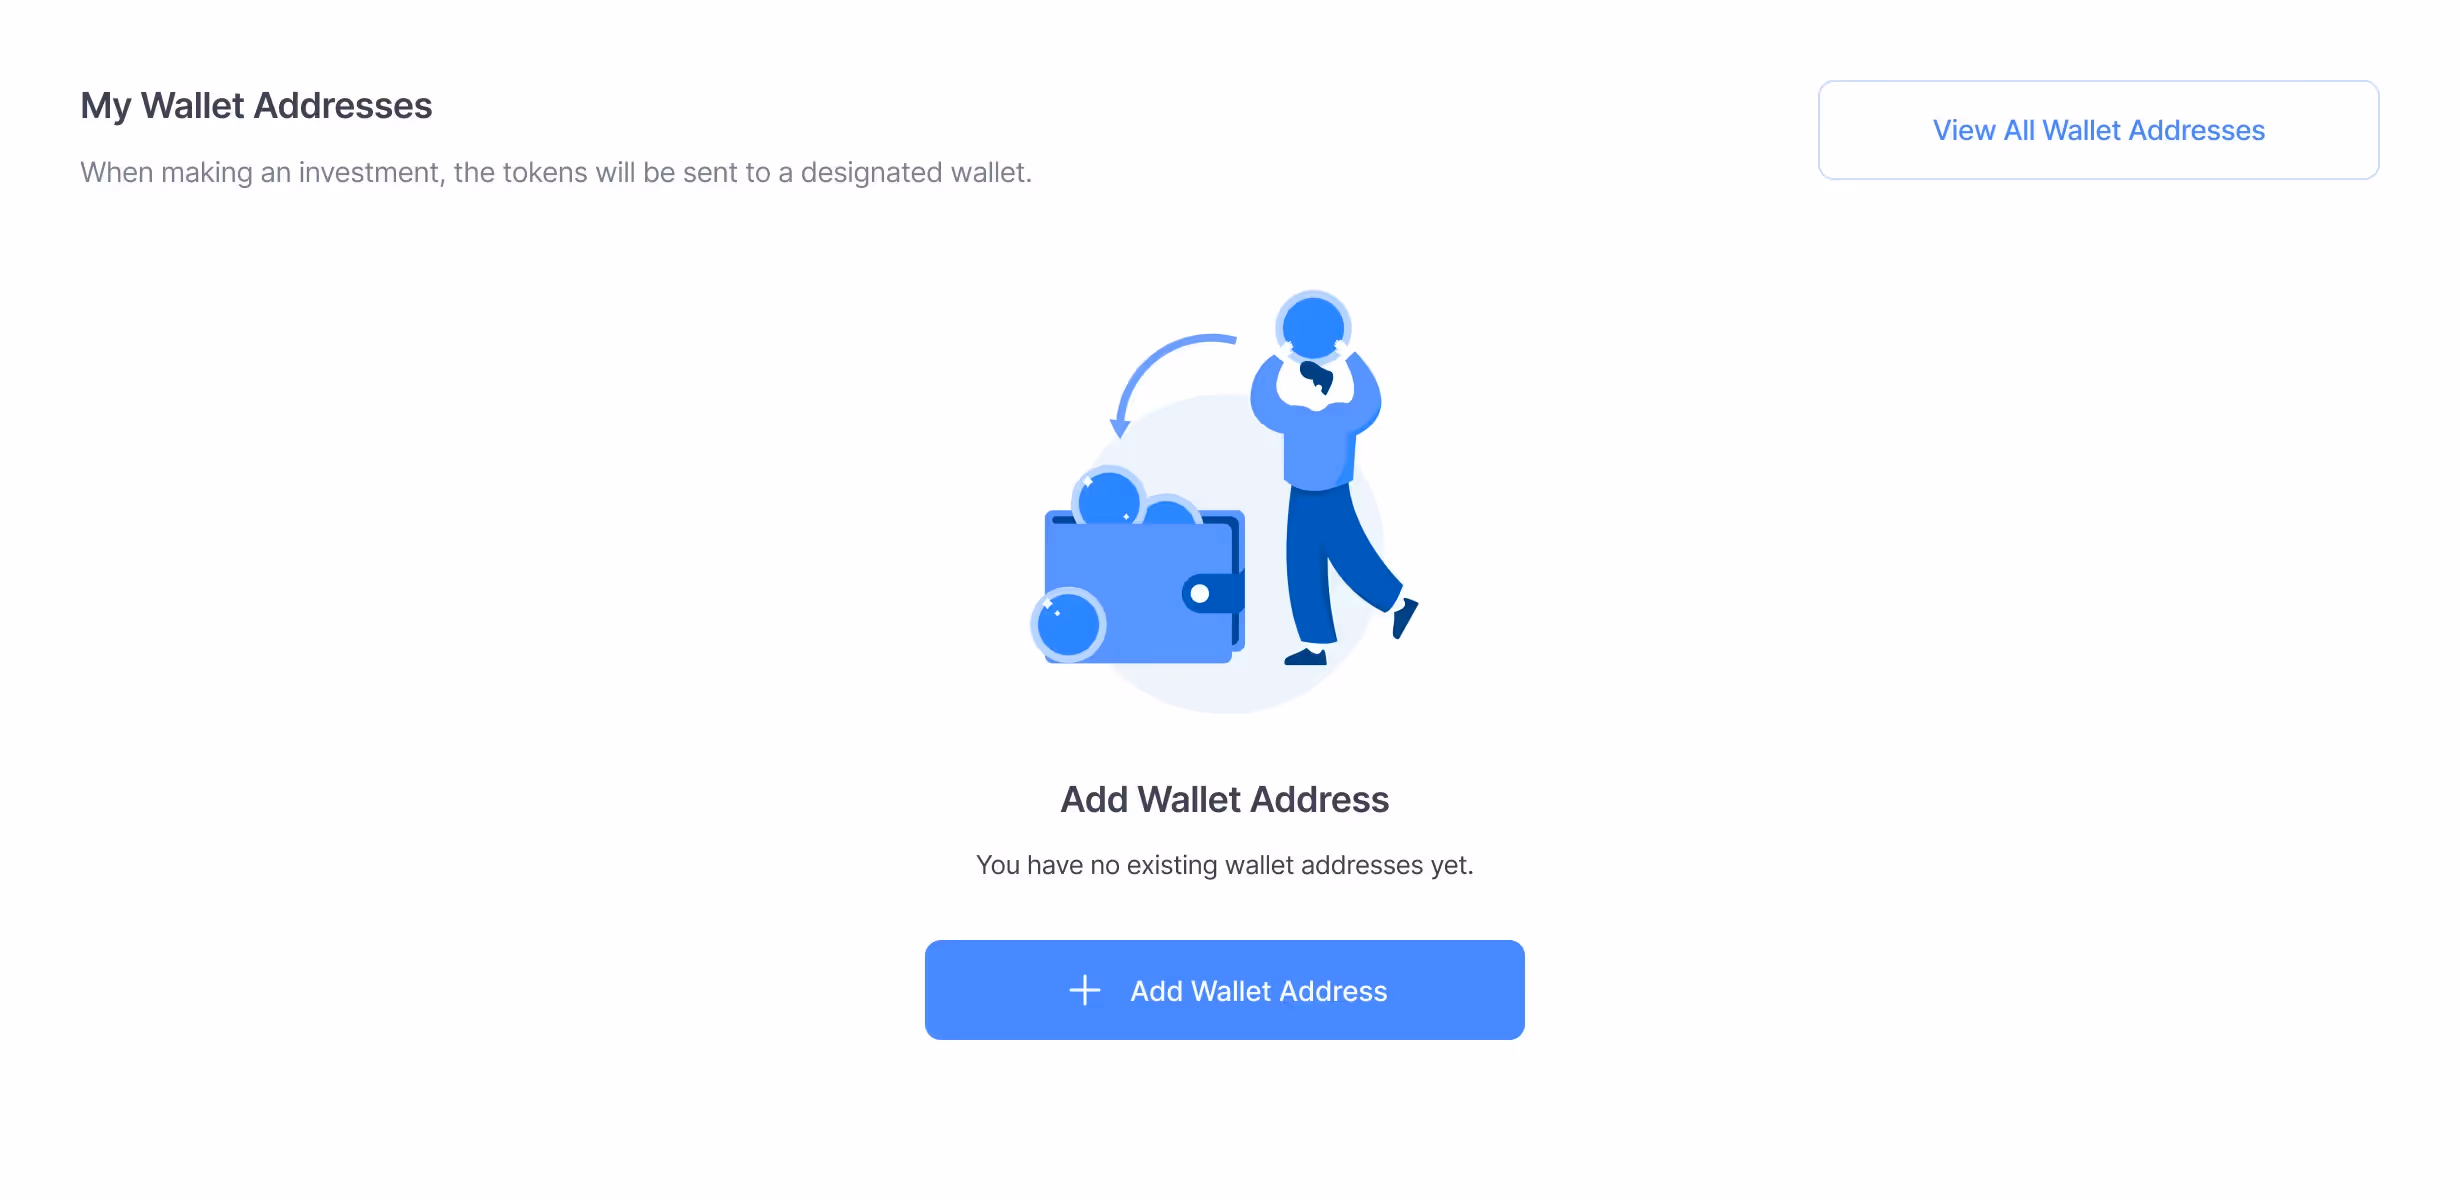
2. Once you’ve logged in and passed KYC/Accreditation, you can now begin trading on the InvestaX platform. If you’re using the Coinbase Wallet, make sure you have the web extension on your browser.
Click on ‘Add Wallet Address’ to get started.
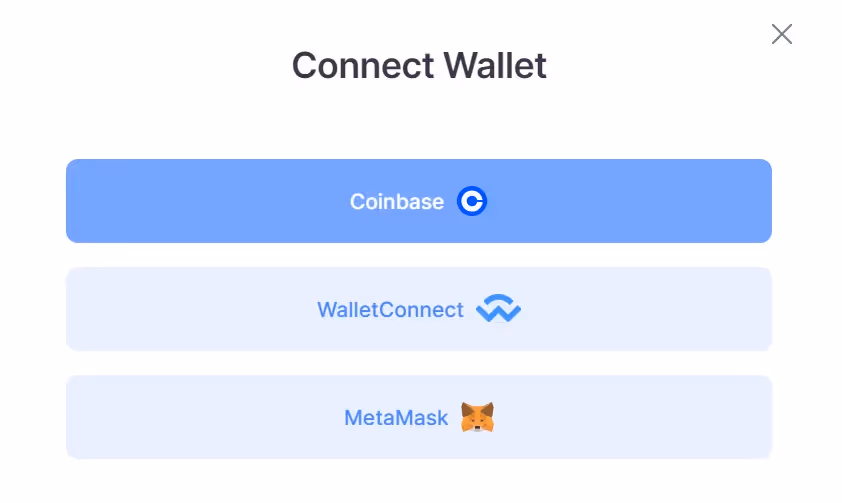
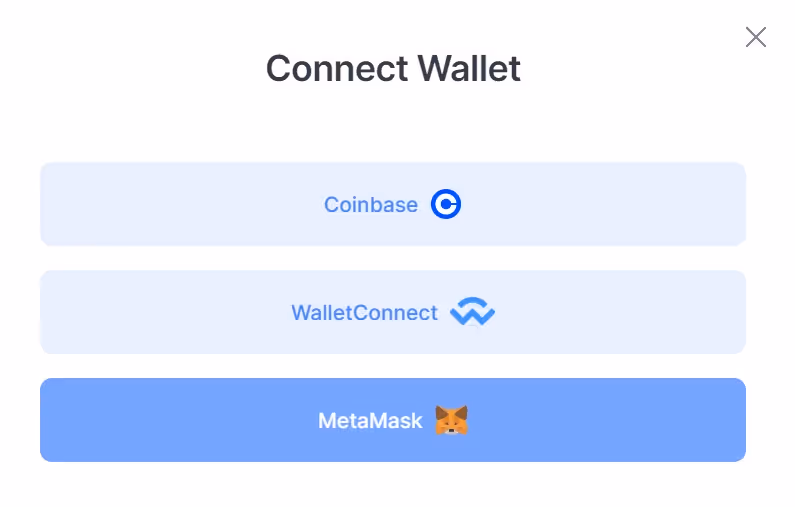
3. A prompt should appear asking you to choose which web3 wallet you want to connect with. Click on Coinbase.
And another prompt should appear.
4. In the prompt, click on ‘Connect’

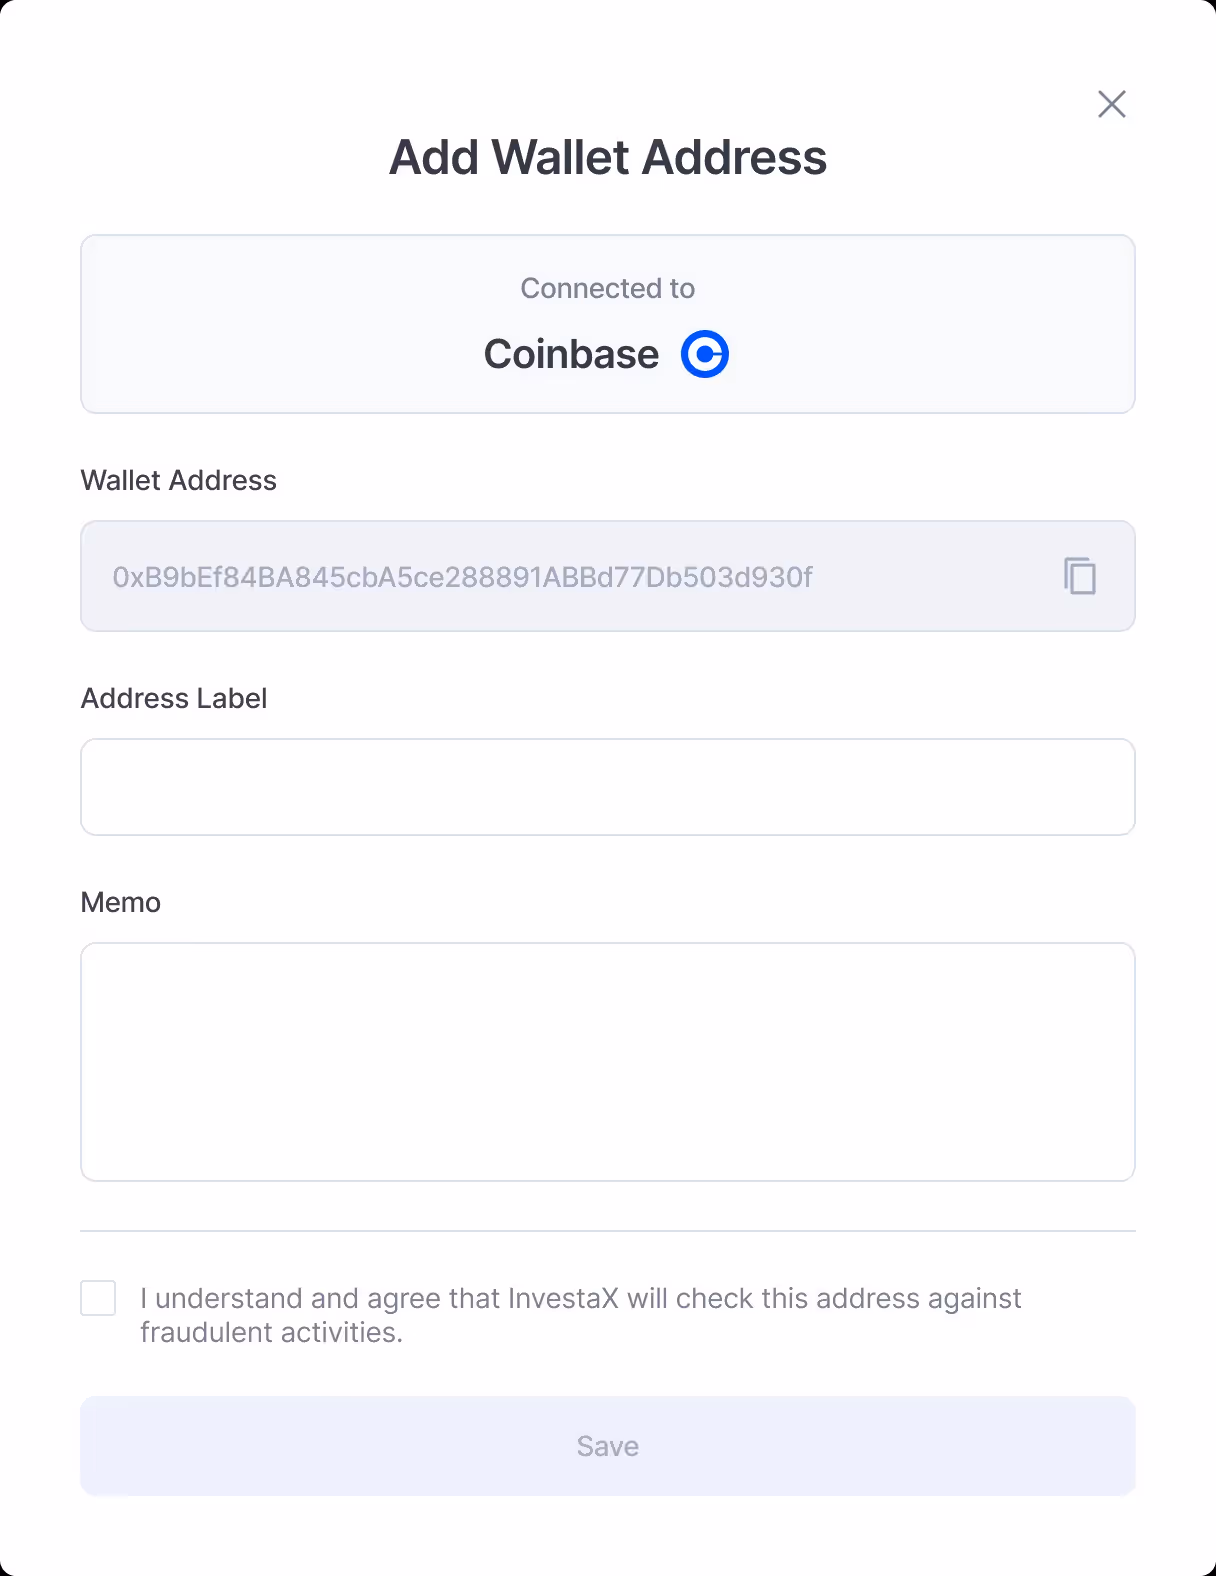
5. Once connected, you should see a prompt to fill in your Coinbase wallet address.
Fill in your ‘Address Label’, your address label is up to you on how you want to name your wallet.
Then, just tick the terms and conditions, click ‘Save’. Your Coinbase wallet is now connected to InvestaX.
Changing and Selecting Networks on Coinbase Wallet
To change and select your desired network on the Coinbase wallet, simply click on the Coinbase Wallet extension on your browser.
1. Click on the ‘Network’ icon. In this instance its on the Ethereum network, hence the Ethereum logo.

2. After doing so, you should be able to choose a network you want to connect with. For InvestaX, please choose the ‘Ethereum’ network.
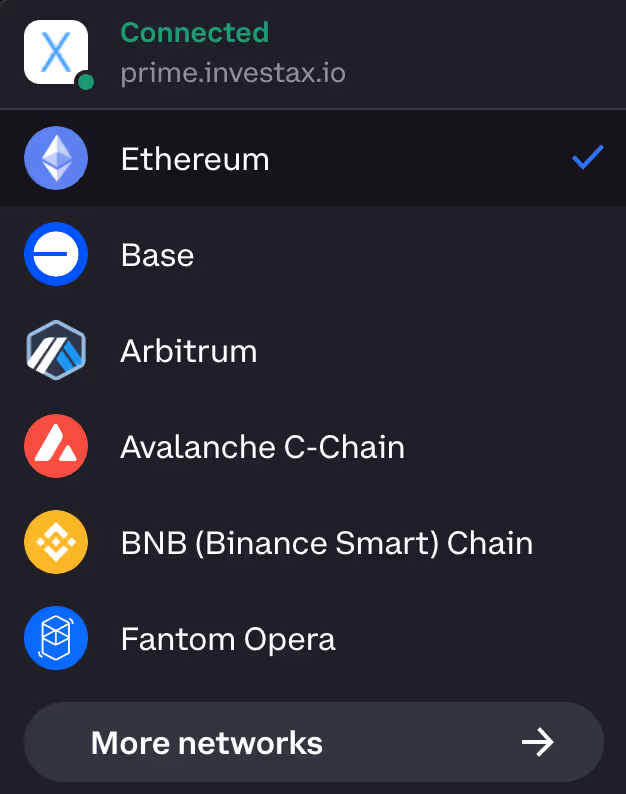
And voila! All done!
2. Using Metamask Wallet on InvestaX
To use Metamask wallet on InvestaX, follow these steps:
- Set up a Metamask wallet account on Metamask web extension
- Connect your Metamask wallet with InvestaX
- Switch network if needed
Let's go into details.
Set Up Your Coinbase Wallet Account
If you don’t have a Metamask wallet yet, you can create one using the link provided here.
Connect Your Coinbase Wallet With InvestaX
Once you have your Metamask wallet and browser extension ready. You can follow the steps below to connect to InvestaX.
1. Sign in to the InvestaX app
Head on over to the InvestaX login portal, and sign in using your credentials.
2. Once you’ve logged in and passed KYC/Accreditation, you can now begin trading on the InvestaX platform. If you’re using a Metamask wallet, make sure you have the web extension on your browser.
Click on ‘Add Wallet Address’ to get started.
3. A prompt should appear asking you to choose which web3 wallet you want to connect with. Click on Metamask.
4. A prompt should appear to let you choose Metamask account(s) to continue.
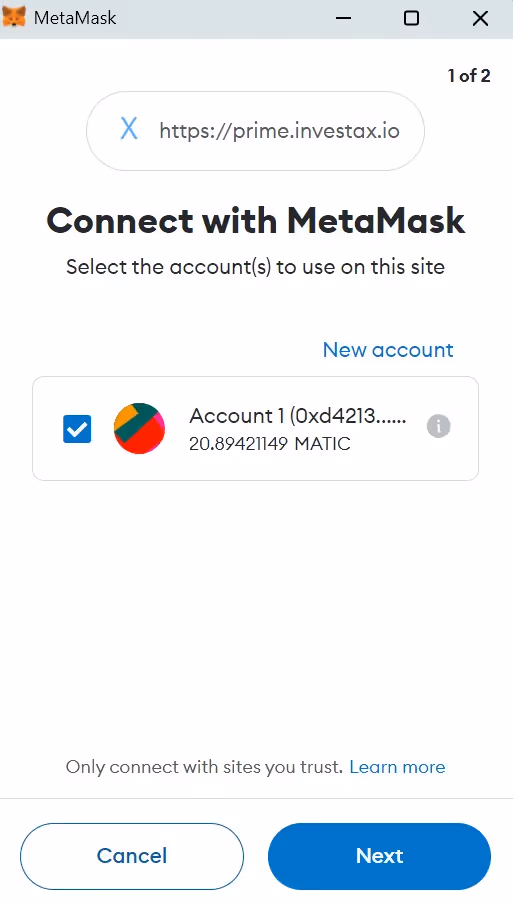
5. Then click ‘Connect’
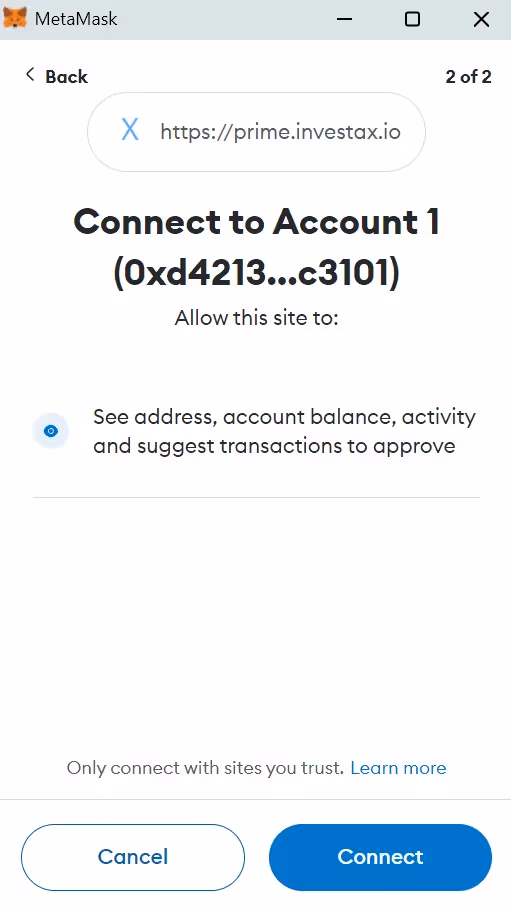
6. Once connected, you should see a prompt to fill in your Metamask wallet address.
Fill in your ‘Address Label’, your address label is up to you on how you want to name your wallet.
Then, just tick the terms and conditions, click ‘Save’.
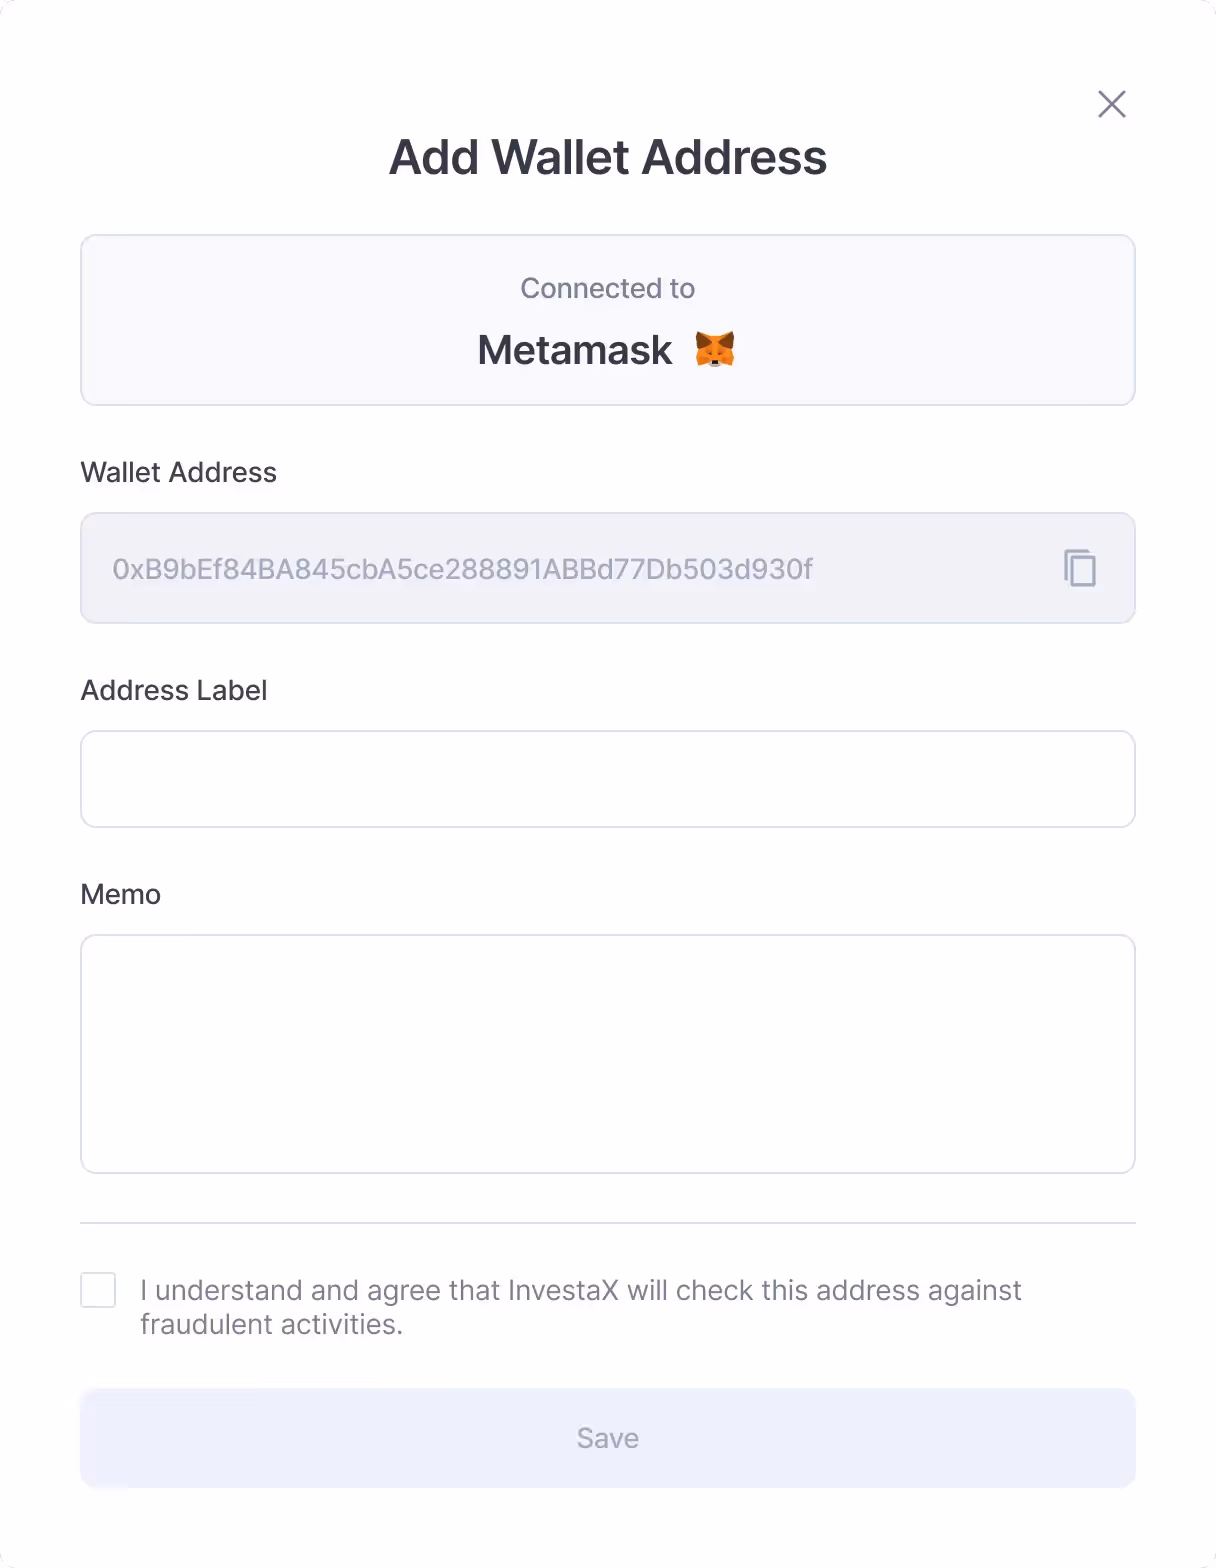
Success! Your Metamask wallet is now connected to InvestaX.
Changing and Selecting Networks on Metamask Wallet
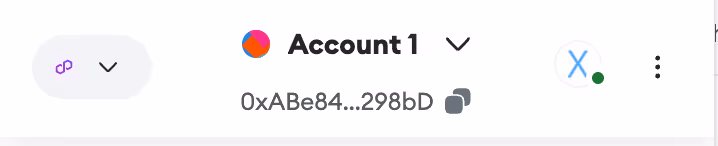
To change and select your desired network on the Metamask wallet. Simply click on the Metamask wallet extension on your browser.
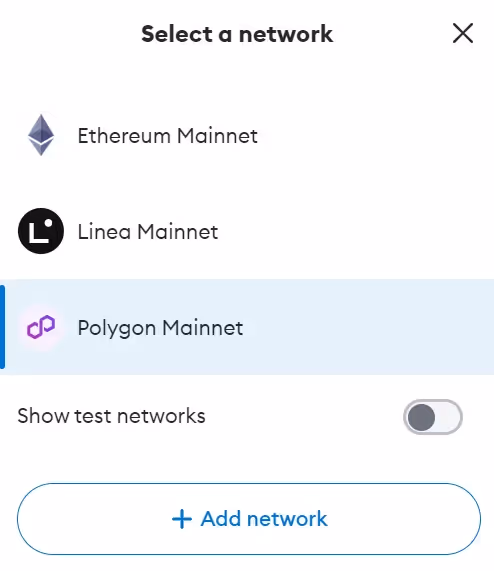
1. Click on the ‘Network’ icon. In this instance it's on the Polygon network, hence the Polygon logo.
2. After doing so, you should be able to see a list of networks you want to connect with. To connect with InvestaX Prime, please choose the ‘Ethereum’ network.
And voila! All done!
In case you encounter any challenges, please contact us at support@investax.io for assistance. Thank you!